Other Morchok guides on Tauri Veins:
 This guide is intended to provide a comprehensive description of the
encounter with Morchok in Dragon Soul. It is targeted to anyone
who desires to understand the fight mechanics.
This guide is intended to provide a comprehensive description of the
encounter with Morchok in Dragon Soul. It is targeted to anyone
who desires to understand the fight mechanics.
This guide applies to patch 4.3 of World of Warcraft.
Morchok is the first boss encounter of the Dragon Soul raid. He acts as a
sort of gatekeeper. Defeating him allows players access to the various NPCs in
Wyrmrest Temple, as well as to some of the other bosses.
This encounter is, in our opinion, the easiest of the 8 boss encounters
within the Dragon Soul.
1. General Information↑top
| 10-man |
36M |
7 minutes |
1-2 |
2-3 |
5-7 |
| 10-man Heroic |
42M |
7 minutes |
2 |
2-4 |
4-6 |
| 25-man |
102M |
7 minutes |
1-2 |
5-6 |
17-19 |
| 25-man Heroic |
180M |
7 minutes |
2 |
6-8 |
15-17 |
| LFR |
76.5M |
7 minutes |
2 |
5-6 |
17-18 |
2.1. Armor
2.2. Weapons
2.3. Necklaces, Rings, and Trinkets
| Item Name |
Type |
Main Stats/Effect |
| Petrified Fungal Heart (LFR, Heroic) |
Necklace |
Intellect/Spirit |
| Signet of Suturing (LFR, Heroic) |
Ring |
Intellect/Spirit |
| Infinite Loop (LFR, Heroic) |
Ring |
Intellect/Hit |
| Seal of Primordial Shadow (LFR, Heroic) |
Ring |
Agility |
| Breathstealer Band (LFR, Heroic) |
Ring |
Strength/Mastery |
| Hardheart Ring (LFR, Heroic) |
Ring |
Strength/Parry |
| Windward Heart (LFR, Heroic) |
Trinket |
Intellect/Additional Heal |
| Cunning of the Cruel (LFR, Heroic) |
Trinket |
Intellect/AoE Damage |
| Vial of Shadows (LFR, Heroic) |
Trinket |
Agility/Additional Damage |
| Bone-Link Fetish (LFR, Heroic) |
Trinket |
Strength/AoE Damage |
| Indomitable Pride (LFR, Heroic) |
Trinket |
Stamina/Shield |
3. Overview of the Fight↑top
Morchok is a relatively simple encounter made up of two alternating
phases:
-
 The Crystal Phase, which lasts approximately 1 minute,
is a tank and spank phase during which the
raid is faced with two tasks (other than attacking the boss):
The Crystal Phase, which lasts approximately 1 minute,
is a tank and spank phase during which the
raid is faced with two tasks (other than attacking the boss):
- the tanks need to regularly taunt the boss off of each other;
- a few players will have to soak the proximity damage done by crystals
that the boss summons.
-
 The Black Blood Phase, which lasts approximately 30 seconds,
requires your raid to hide behind pillars
of stone (created during the encounter) to avoid being hit by the Black
Blood flowing out from Morchok.
The Black Blood Phase, which lasts approximately 30 seconds,
requires your raid to hide behind pillars
of stone (created during the encounter) to avoid being hit by the Black
Blood flowing out from Morchok.
Finally, at 20% health, Morchok gains the  Furious buff. This does not
affect the alternation between the Crystal Phase and the Black Blood Phase: the
fight continues normally, just that the boss deals more damage and attacks
faster.
Furious buff. This does not
affect the alternation between the Crystal Phase and the Black Blood Phase: the
fight continues normally, just that the boss deals more damage and attacks
faster.
4. Crystal Phase↑top
The Crystal Phase is the main phase of the fight, during which your raid
will mostly deal damage to Morchok while handling the few abilities
that he possesses. This phase lasts for 1 minute, approximately.
4.1. Abilities
During the Crystal Phase, Morchok has the following abilities:
 Crush Armor is a stacking debuff applied by Morchok on his tank
every 6 seconds. It stacks up to 10 times and each stack reduces armor by 10%,
eventually forcing a tank swap.
Crush Armor is a stacking debuff applied by Morchok on his tank
every 6 seconds. It stacks up to 10 times and each stack reduces armor by 10%,
eventually forcing a tank swap.-

 Stomp (LFR/10-man/25-man) is an AoE attack that Morchok casts every 10 to 15
seconds. It deals 750,000 physical damage in 10-man difficulty,
1,625,000 in LFR difficulty (though the tooltip says differently at the moment),
and 2,500,000 in 25-man difficulty. The damage is evenly
split between players within 25 yards of Morchok (though the tank and
the player closest to the tank take a double share of damage).
Stomp (LFR/10-man/25-man) is an AoE attack that Morchok casts every 10 to 15
seconds. It deals 750,000 physical damage in 10-man difficulty,
1,625,000 in LFR difficulty (though the tooltip says differently at the moment),
and 2,500,000 in 25-man difficulty. The damage is evenly
split between players within 25 yards of Morchok (though the tank and
the player closest to the tank take a double share of damage).
-

 Resonating Crystal is cast by Morchok every 15 seconds,
approximately. This ability summons a red crystal that explodes after 12
seconds, dealing split damage to the 3 closest players in LFR and 10-man
difficulties and the 7 closest players in 25-man difficulty. The total
damage dealt by the explosion decreases when the players are close to the
crystal (between 25,000 and 30,000 damage each if all players are standing
close to the crystal when it explodes).
Resonating Crystal is cast by Morchok every 15 seconds,
approximately. This ability summons a red crystal that explodes after 12
seconds, dealing split damage to the 3 closest players in LFR and 10-man
difficulties and the 7 closest players in 25-man difficulty. The total
damage dealt by the explosion decreases when the players are close to the
crystal (between 25,000 and 30,000 damage each if all players are standing
close to the crystal when it explodes).
In addition, Morchok performs a melee attack on his current
target every 2.5 seconds. This attack hits for approximately
30,000 in 10-man difficulty, 60,000 in LFR difficulty, and probably
a bit more in 25-man difficulty. The damage of the melee attacks increases
the more stacks of Crush Armor that the tank has.
4.2. Strategy
The strategy for properly handling the Crystal Phase revolves around
3 simple tasks (which we further detail below):
Other than that, this phase should be dedicated to doing as much damage
as possible to Morchok.
4.2.1. Positioning
 Because of Stomp (LFR/10-man/25-man), the raid should be positioned within 25 yards
of the boss. There are no other positioning constraints, though stacking
together, close to the boss, will make AoE healing more efficient.
Because of Stomp (LFR/10-man/25-man), the raid should be positioned within 25 yards
of the boss. There are no other positioning constraints, though stacking
together, close to the boss, will make AoE healing more efficient.
Stomp deals a double share of damage to the current tank and to the
player that is the closest to the tank. Ideally, this double share of damage
should always hit the two tanks.
The only players who will have to move out of the 25-yard radius are those
that will have been targeted by Resonating Crystal.
4.2.2. Tank Swap
Because of Crush Armor, the tanks will need to regularly taunt the
boss off of each other. The debuff lasts 20 seconds and stacks every 6 seconds,
which means that the taunt should occur as soon as a 4th stack is applied
on the current tank.
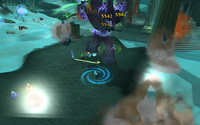
4.2.3. Resonating Crystal
 Every 15 seconds (so 3 times per Crystal Phase), Morchok will summon
a new crystal. Closest players (3 in 10-man difficulty and 7 in
25-man and LFR difficulties) will be easily identified by the beam of
light that links them to the Crystal. The beam changes colour, depending on
the distance between the player and the crystal (red/yellow when the player
is far from the crystal and blue when the player is close).
Every 15 seconds (so 3 times per Crystal Phase), Morchok will summon
a new crystal. Closest players (3 in 10-man difficulty and 7 in
25-man and LFR difficulties) will be easily identified by the beam of
light that links them to the Crystal. The beam changes colour, depending on
the distance between the player and the crystal (red/yellow when the player
is far from the crystal and blue when the player is close).
 After 12 seconds, the crystal will explode, knocking back the targeted
players (provided that they have done their job and moved next to the crystal)
and dealing damage to them.
After 12 seconds, the crystal will explode, knocking back the targeted
players (provided that they have done their job and moved next to the crystal)
and dealing damage to them.
Even though the beams initially target the closest players
and it is possible to replace someone by simply moving closer to
the crystal than they are. It enables more aware players to compensate
for other players' lack of reaction.
To deal with Resonating Crystal, you can either have the closest players
move to the Crystal when it spawns or have a set of designated players that
will handle every Crystal that spawns.
4.2.4. Tips
- The combined damage of Stomp (LFR/10-man/25-man) and the explosion of
Resonating Crystal can be dangerous for the targeted players. Healers
should be especially careful of this situation, should it occur.
There are two ways to avoid this:
- Morchok's tank can move him away from the crystal;
- Targeted players can stack next to the crystal, on the
opposite side from Morchok, so that they exit the 25-yard radius
(this is not always possible).
- Since the damage from the explosion of Resonating Crystal is Shadow
damage, Affliction and Demonology Warlocks
(
 Shadow Ward), and Destruction Warlocks ( Shadow Ward +
 Nether Ward +
  Nether Protection) are particularly well suited
to handle this ability. Using
Nether Protection) are particularly well suited
to handle this ability. Using  Shadow Protection or
  Resistance Aura
is also useful.
Resistance Aura
is also useful.
- Healers can use abilities such as
 Power Word: Barrier and
 Spirit Link Totem (placed so that they cover the are around the crystal),
or
Spirit Link Totem (placed so that they cover the are around the crystal),
or  Aura Mastery, to reduce the damage that the targeted players
take.
Aura Mastery, to reduce the damage that the targeted players
take.
5. Black Blood Phase↑top
Shortly after the explosion of the third Resonating Crystal, Morchok
enters the Black Blood Phase, during which he casts 3 abilities
in quick succession before resuming the Crystal Phase. Players will be pulled
to Morchok before having to rapidly take cover to avoid a very damaging
ability.
5.1. Abilities
During the Black Blood Phase, Morchok casts 3 abilities in the
following order:
-
 Earthen Vortex marks the beginning of the Black Blood Phase. All players
are pulled towards Morchok and begin to take physical damage equivalent to 5%
of their health every second for 5 seconds.
Earthen Vortex marks the beginning of the Black Blood Phase. All players
are pulled towards Morchok and begin to take physical damage equivalent to 5%
of their health every second for 5 seconds.
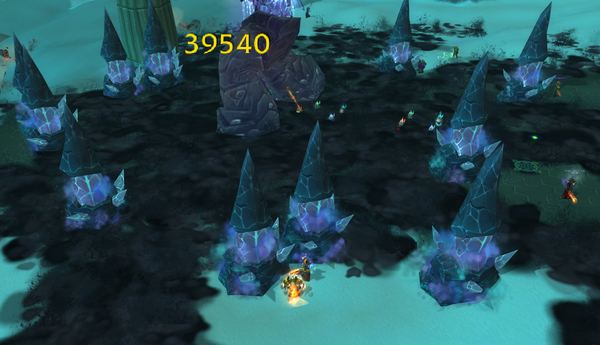
 Falling Fragments is cast immediately after all players have been
pulled towards Morchok. This ability is channeled for 5 seconds and creates
stone pillars around Morchok. Standing next to the location where a pillar is
created deals 15,000 physical damage in 10-man and 25-man difficulties and
9,750 physical damage in LFR difficulty. You will notice that players hardly
ever take damage from being too close to a pillar.
Falling Fragments is cast immediately after all players have been
pulled towards Morchok. This ability is channeled for 5 seconds and creates
stone pillars around Morchok. Standing next to the location where a pillar is
created deals 15,000 physical damage in 10-man and 25-man difficulties and
9,750 physical damage in LFR difficulty. You will notice that players hardly
ever take damage from being too close to a pillar.-
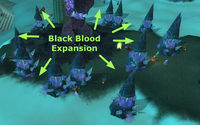
 Black Blood of the Earth is cast immediately after the channel of Falling
Fragments has finished. For 24 seconds, Black Blood will flow outwards from
Morchok. Players standing in it will receive a stacking debuff that disappears
as soon as they step out of the blood. The debuff stacks
every second and each stack inflicts 5,000 nature damage per second
(3,250 in LFR difficulty).
Black Blood of the Earth is cast immediately after the channel of Falling
Fragments has finished. For 24 seconds, Black Blood will flow outwards from
Morchok. Players standing in it will receive a stacking debuff that disappears
as soon as they step out of the blood. The debuff stacks
every second and each stack inflicts 5,000 nature damage per second
(3,250 in LFR difficulty).
5.2. Strategy
 The strategy for this phase is very straightforward. As soon as Morchok pulls
the players to him, everyone needs to run behind the pillars of stone created by
Falling Fragments, as they offer protection from Black Blood of the Earth.
There is plenty of time to reach the pillars, so no one should take damage
from the blood.
The strategy for this phase is very straightforward. As soon as Morchok pulls
the players to him, everyone needs to run behind the pillars of stone created by
Falling Fragments, as they offer protection from Black Blood of the Earth.
There is plenty of time to reach the pillars, so no one should take damage
from the blood.
Once behind a pillar, there is no other source of damage until the Crystal
Phase resumes. Therefore, healers should focus on getting behind a pillar before
trying to heal those that are in range of them.
5.3. Tips
 Ranged DPS can continue attacking Morchok while hidden from
Black Blood of the Earth by a pillar. To do so, they need to hide behind a
pair of adjoining pillars. This way, by positioning themselves in the middle
of the two pillars, they will be able to hit Morchok.
Ranged DPS can continue attacking Morchok while hidden from
Black Blood of the Earth by a pillar. To do so, they need to hide behind a
pair of adjoining pillars. This way, by positioning themselves in the middle
of the two pillars, they will be able to hit Morchok.
This is the ideal time for healers to use mana regeneration cooldowns such
as  Hymn of Hope and
  Divine Plea, as from a healing perspective, there
is nothing else to do during this time. Additionally, healers can use a
Potion of Concentration during this phase, to further take advantage of
the respite.
Divine Plea, as from a healing perspective, there
is nothing else to do during this time. Additionally, healers can use a
Potion of Concentration during this phase, to further take advantage of
the respite.
6. The Furious buff↑top
At 20% health, Morchok gains the Furious buff. This is the ideal time
to use  Bloodlust/
 Heroism/
 Time Warp (during a Crystal Phase, not
a Black Blood Phase).
Time Warp (during a Crystal Phase, not
a Black Blood Phase).
7. Learning the Fight↑top
The encounter against Morchok is not difficult in any way, and the most
important things for your raid to master in order to succeed are
Resonating Crystal soaking and avoiding damage from
Black Blood of the Earth. Hopefully, this guide will have shown you
how to successfully deal with these two abilities.
8. Heroic Mode↑top
The heroic version of the Morchok encounter is, arguably, the easiest heroic
mode in the Dragon Soul raid. This does not, however, mean that the fight
is easy. You will find that the fight does not change very much from normal
mode in its mechanics, but it puts a much greater strain on the raid as a
whole.
8.1. Differences from Normal Mode
The differences between normal and heroic Morchok are simple.
- At 90% health, Morchok splits himself in two, and your raid has to
fight both Morchoks at the same time (the other boss is called Kohcrom).
- Both bosses use the same abilities as Morchok does in normal mode, with the
same frequency and in the same way.
- Crush Armor no longer exists, meaning that there is no need to tank
switch on either of the two bosses.
- Morchok and Kohcrom have separate health pools, but every time you deal
damage to one of them, both bosses take an equal share of damage (as was the
case with Rhyolith's legs in Firelands).
In addition to this, the bosses have more health, melee the tanks for more,
and all of their abilities deal more damage.
Below, you will find the best strategy for defeating this heroic
encounter, but first, a few preliminary mentions are needed.
8.2. Preliminary Mentions
Morchok and Kohcrom should be treated, for all intents and purposes, as
two completely different bosses (although they behave identically).
The heroic mode part of the fight only truly begins after
Morchok reaches 90% health. Until then, the fight is unchanged from normal
mode. Because Morchok's health is not especially high, he will get to 90%
health right around the time that he spawns the first crystal.
It is important that you clear as much of the trash mobs around the
fighting area as possible, to give yourself ample room.
8.2.1. Raid Composition
The raid composition does not necessarily change from normal mode. You
will still want to bring two tanks, one for each boss. The number of healers
you bring depends on how much healing you require and how much DPS you can
afford to lose.
Bringing 4 healers in 10-man and 8 in 25-man will make the fight
considerably easier. Keep in mind, though, that heroic Morchok has a rather
tight enrage timer of 7 minutes.
8.2.2. Splitting the Raid
You should split your raid into two groups, as follows, and each group
should handle one of the two bosses:
- in 10-man difficulty, 5 players per group: 1 tank, 1-2 healers, 2-3
DPS;
- in 25-man difficulty, 12 players in one group and 13 in another: 1 tank,
3-4 healers, 8-9 DPS.
Each group should have one DPS player who will be assigned to take a
double share of damage from Stomp (LFR/10-man/25-man) and survive. There are several
viable classes for this role:
- Rogues (thanks to
 Feint);
- Plate-wearing DPS class (thanks to their higher health pool and
armor);
- Balance Druids (thanks to the damage reduction granted by
 Moonkin Form; in cases of necessity, they can also use
 Barkskin);
- Fire Mages (thanks to
 Cauterize, every 45 seconds or more).
8.3. Strategy
The strategy for this fight is simple, although there are many subtleties
and tricks that your raid should make use of, which we detail in a later
section.. The difficult part is the
Crystal Phase, with the Black Blood phase remaining relatively unchanged and
extremely simple.
8.3.1. Pre-90% Health
The start of the heroic mode happens when Morchok reaches 90% health,
splitting in two. Prior to this, however, the fight is identical to the
normal mode encounter, except that there is more damage from
Stomp (LFR/10-man/25-man). It should go by very quickly and without problems.
Depending on your raid's DPS, Morchok may cast the first
Resonating Crystal right before reaching 90% health, and then split
immediately after. If this happens, your raid leader will have to decide which
of the two groups will soak the crystal (depending on where the crystal
spawns).
8.3.2. General Strategy
When Morchok reaches 90% health, he will split in two. When splitting,
Morchok will jump to a specific place (in the center of the road where you
are fighting him) and effectively become two different bosses. The boss
called Morchok will be on the right-hand side, and Kohcrom will be on the
left-hand side, as you are facing Wyrmrest Temple.
The two bosses will remain stationary for around 5 seconds, before they can
be moved by the tanks. Keep in mind that, during this time, threat is still
generated normally against them, so DPS players should be careful.
Immediately after splitting, the two tanks must quickly move the two
bosses far apart. After this point, the strategy for each of the two groups
becomes simple (although very strenuous for healers), and can be summarised
like this:
- Every player must always be within 25 yards of their group's boss, in
order to share the damage from Stomp (LFR/10-man/25-man).
- 3 players in 10-man difficulty and 7 in 25-man difficulty must handle the
Resonating Crystals. You should decide ahead of time who these players will
be.
- A designated player should be extremely close to the boss, in melee range,
in order to soak the increased damage that Stomp deals to the closest two
targets (the other target being the tank).
Each group will have to repeatedly soak crystals and survive the damage
from Stomp, until the bosses go into the Black Blood Phase (they do this at
the same time). This phase remains completely unchanged and should be dealt
with as in normal mode. The damage that the black blood deals is extremely
low, and players can afford to take many ticks from it without being in danger
of dying.
8.3.3. Things to Watch Out For
Unlike in normal mode, it is crucial that the players handling
Resonating Crystal always be within 25 yards of their boss. To ensure this,
there are a few important, yet not very obvious things to watch out for:
- Whenever one of the bosses casts Resonating Crystal, its tank should move it
close to the crystal (but not on the crystal), so that designated players
can stack on the crystal while still being within 25 yards of the boss.
- If there is one or more melee DPS in the group of designated players,
bringing the boss close enough will enable them to continue attacking it.
- In the event that the boss is not quite close enough to the crystal to
allow players to stack on the crystal while being in a 25 yard range of the
boss, the crystal soakers will first have to remain in range of the boss for
the next Stomp, and then quickly move to the crystal (they should have around
5 seconds to do this).
When handling Resonating Crystals, players who are assigned to this task
should make sure to position themselves on the side of the crystal that is
towards the boss (so, between the crystal and the boss), so that the knock-back
will push them towards the boss.
Also, the tank will have to make sure that they are the closest player to the
boss at all times (second only to the other designated melee player).
Note that Morchok and Kohcrom do not use their abilities in exactly the same
order or with the exact same frequency. Most importantly, while both bosses
perform 4 stomps during each Normal Phase, Morchok spawns 3 Resonating
Crystals, while Kohcrom only spawns 2.
Healing will generally be quite difficult. In particular, it will
be extremely difficult at those times when a Resonating Crystal is preceded
and followed by a Stomp. When this happens, all players should do everything
that they can to survive (by using personal cooldowns or healthstones) and
healers should attempt to use their own cooldowns.
8.3.4. Furious and Bloodlust/Heroism
At 20% health, both bosses will gain the Furious buff, exactly like
in normal mode. This will increase their damage and attack speed, making this
last part of the fight extremely difficult.
The ideal time to use Bloodlust/ Heroism/ Time Warp is
immediately after the first Black Blood Phase that happens after the bosses
reach 20% health.
9. Achievement: Don't Stand So Close to Me↑top
The  Don't Stand So Close to Me achievement is a part of the
 Glory of the Dragon Soul Raider meta-achievement. The achievement requirement
is very simple: defeat Morchok without any raid members being closer than 5
yards to one another during the Black Blood Phases. It is important to note
that, for 25-man difficulty, the requirement is more lenient, namely that no
3 players be closer than 5 yards to one another, to account for the increased
number of players.
Glory of the Dragon Soul Raider meta-achievement. The achievement requirement
is very simple: defeat Morchok without any raid members being closer than 5
yards to one another during the Black Blood Phases. It is important to note
that, for 25-man difficulty, the requirement is more lenient, namely that no
3 players be closer than 5 yards to one another, to account for the increased
number of players.
There is no real "strategy" required for completing this achievement,
other than good awareness and common sense. For 10-man raids, simply assign
rough positions for every player (you can make use of raid markers for this
purpose) and have them spread out around their designated areas.
In 25-man,
you can do the same, with the added mention that you can pair players up
together, so that you only have to deal with 13 locations instead of 25, as
the achievement criterion is different, as stated above.
10. Final Considerations↑top
This concludes the Morchok strategy guide. The fight is the least complex
from the Dragon Soul raid. It also has the simplest execution. This encounter
will probably serve as a preliminary gear check for any raid attempting to
bring about the demise of Deathwing.