Other Spine of Deathwing guides on Tauri Veins:  This guide is intended to provide a comprehensive description of theencounter with Spine of Deathwing in Dragon Soul. It is mostly targeted to healerswho desire to have a short but detailed overview of what is expected ofthem during that fight.
This guide applies to patch 4.3 of World of Warcraft.
The Spine of Deathwing encounter takes place on Deathwing's back, as he isflying through the air. During this fight, your raid will have to handle manytypes of adds, with the final goal being to remove three of Deathwing's armorplates.
The fight is, overall, not difficult to understand or execute for a healer,but there are certain times (especially towards the end), when the raid damagemay become quite intense.
1. Overview of the Fight↑top
 Spine of Deathwing is a single phase encounter that takes place onDeathwing's back, as he is flying through the air. Your raid will need toproperly deal with several types of adds in order to pry up and remove3 armor plates from Deathwing's back. The idea is to open a big enoughhole in Deathwing's armor, so as to give Thrall a clear shot with the DragonSoul.
The armor plates can only be removed sequentially, as removing one enablesthe raid to reach the next one. This causes the fight to become increasinglyharder, as the number of adds you need to deal with increases after an armorplate has been removed.
You will be faced with 4 types of adds.
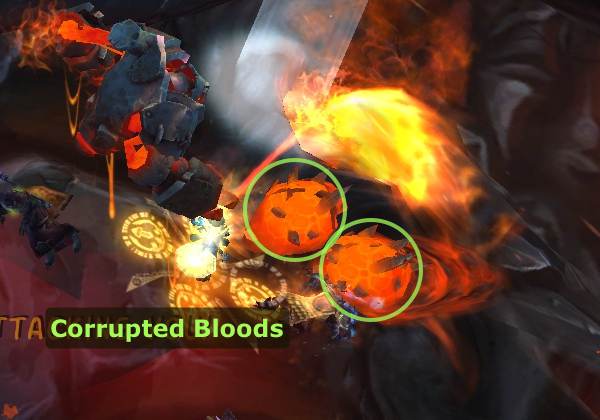
Initially, there are 4 Corruptions. Each armor plate that you removegives room to 2 more Corruptions. There will always be at least one Corruptionup: even if you kill them all, a new one will automatically respawn. When youkill a Corruption, it leaves a hole behind, out of which 1Hideous Amalgamation and 1 Corrupted Blood appear.
When you kill a Corrupted Blood, it respawns after a few seconds andit leaves a puddle on the ground thatgives a buff to the Hideous Amalgamation. The idea is to stack this buff 9times, at which point the Amalgamation should be killed. Doing so willcause the Amalgamation to pry up the closest armor plate, exposing aBurning Tendons.
If you successfully kill the Burning Tendon in the next 23 seconds,the armor plate will be successfully removed, otherwise you need to finishit off after prying up the armor plate again.
3. Strategy↑top
As a healer, the only task you will have to perform, except for healingthe tanks and raid, is to occasionally move into one of the void zones locatedon the sides of Deathwing's back. This causes Deathwing to perform a BarrelRoll, removing all the Hideous Amalgamations from his back.Your raid leader will instruct you when todo this, and which void zone to go to (simply follow the rest of the raid).
In LFR, this will not happen, and you can spend the entire duration ofthe fight performing your healing duties.
3.1. Sources of Damage
The raid will take damage from the following sources:
- Moderate, sustained tank damage from the Hideous Amalgamationadd(s). This damage increases as the Amalgamations gain stacks of
 Absorbed Blood.
 - Low damage on tanks or random raid members from the Corrupted Bloodadds (the small red oozes).
- Low raid-wide damage each time a Corrupted Blood dies (
 Burst (10-man/25-man/LFR)).
 - High raid-wide damage each time a Hideous Amalgamation reaches 9 stacks ofAbsorbed Blood.
- Low damage over time on random raid members, from
 Searing Plasma (10-man/25-man), adebuff that the Corruptions place on players. This also has a healingabsorb effect to it, so these players will need to be healed extensively forthe debuff to wear off (does not exist in LFR).
 - High damage over time on random raid members from the
 Fiery Gripspell that Corruptions channel on players (does not exist in LFR).
4. Heroic Mode↑top
The Heroic mode of the Spine of Deathwing encounter will prove quitedifficult for healers, although not much changes in terms of mechanics fromNormal mode.
4.1. Differences from Normal Mode
All the enemies in the encounter have more health and all abilities dealmore damage. In particular, the damage dealt by Fiery Grip is increasedgreatly, as is the melee damage dealt by Hideous Amalgamations.
Other than this, the following new mechanics are of importance:
 Degradation is a stacking debuff that is applied toall raid members each time a Hideous Amalgamation is killed. Thedebuff reduces the target's maximum health by 5% per stack. It hasan unlimited duration and it cannot be dispelled. Note that the debuffis only applied when a Hideous Amalgamation is actually killed, and notwhen they are disposed of through a Barrel Roll.
 Blood Corruption: Death is a dispellable debuff that willregularly be placed on random raid members. It has a 15 second duration,at the end of which it will wipe the raid. When the debuff isdispelled, it jumps to another nearby target, retaining its remainingduration. After a varying number of dispels, it will mutate into adifferent debuff (
 Blood Corruption: Earth) when jumping to the nexttarget.
- Blood Corruption: Earth is almost identical to BloodCorruption: Death. The only difference is that when thisdebuff runs out, the target receives one or two stacks of Blood of Neltharion. The amount of stacks depends on how many seconds wereleft on the Blood Corruption: Death debuff at the moment when it becameBlood Corruption: Earth. If Blood Corruption: Earth is dispelled several times,it will mutate back into Blood Corruption: Death.
- Blood of Neltharion is a beneficial stacking debuff thatreduces all damage taken by 20% per stack. It can stack up to a maximum of 2times per player. This debuff's purpose is to counter the negative effectsfrom Degradation.
4.2. Strategy
As you have probably noticed, the detrimental effects of Degradationare countered by the damage reduction granted by Blood of Neltharion.Keep in mind, however, that while all players will gain stacks of Degradationevenly, the same cannot be said for stacks of Blood of Neltharion.
As a result of this, you should have a way of tracking the stacks ofBlood of Neltharion on your raid frames and you must pay special attention toplayers with fewer than 2 stacks.
Regarding dispelling Blood Corruption: Death and Blood Corruption: Earth, the following things should be kept in mind:
- Always dispel Blood Corruption: Death immediately;
- Never dispel Blood Corruption: Earth unless
- the raid leader wants the tanks to reach 2 stacks of Blood of Neltharionquickly, in which case you should dispel Blood Corruption: Earth until itends up on a tank OR;
- the player affected by it already has 2 stacks of Blood of Neltharion.
Finally, keep in mind that your raid leader will almost surelyassign specific healers to dispelling duty (so that Blood Corruption: Earthdoes not accidentally get dispelled) and you should respect theseassignments.